
When building serverless solutions in Azure, securely connecting to services like Microsoft Dataverse (formerly Common Data Service) is a common task. Azure Functions combined with Managed Identity offers a clean and secure way to authenticate without managing secrets. In this post, I’ll show you how to access the Dataverse OData API using a managed identity, and share a few gotchas—like needing the Application (client) ID, not the Object ID, when registering the app in Power Platform.
Why Managed Identity?
Managed Identity lets your Azure Function authenticate against Azure AD and access resources like Dataverse without needing any client secrets or certificates.
Step 1: Configure Azure Function for Managed Identity
In your Azure Function:
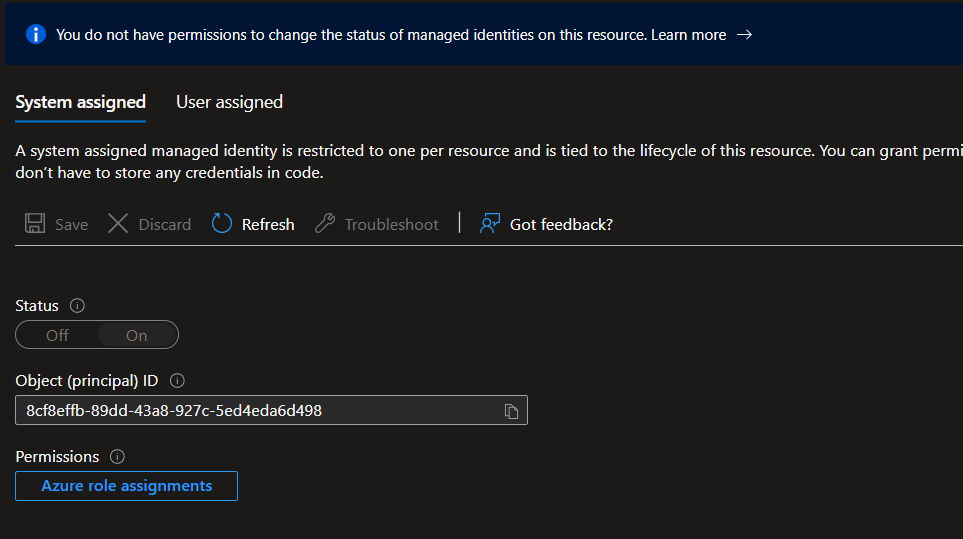
- Go to the Identity blade in the portal.
- Enable the System-assigned managed identity.
- Copy the Object ID (you’ll need this in the next step).
Step 2: Register the Managed Identity as an App User in Power Platform
Here’s the tricky part: Power Platform (Dataverse) requires the Application (client) ID of an Entra ID Enterprise Application, not the Object ID.
Here’s how to get it:
- Go to Microsoft Entra ID → Enterprise Applications.
- Search for the Object ID from your Azure Function’s Identity blade.
- Open that Enterprise App and copy the Application ID (this is what Dataverse wants).
- In Power Platform Admin Center, create a new App User, paste this Application ID, and assign the correct security role.
Step 3: Implement a Custom Auth Handler in Your Azure Function
Now, let’s get to code.
Create a delegating handler that uses DefaultAzureCredential to fetch a token for Dataverse:
public sealed class DataverseManagedIdentityAuthHandler : DelegatingHandler
{
    private readonly DefaultAzureCredential _credential = new();

    protected override async Task<HttpResponseMessage> SendAsync(HttpRequestMessage request,
        CancellationToken cancellationToken)
    {
        var scopes = new[] { "https://{your-environment}.api.crm.dynamics.com/" };

        var token = await _credential.GetTokenAsync(
            new TokenRequestContext(scopes),
            cancellationToken);

        request.Headers.Authorization = new AuthenticationHeaderValue("Bearer", token.Token);

        return await base.SendAsync(request, cancellationToken);
    }
}Step 4: Register the HTTP Client with Dependency Injection
Here’s a clean way to set up your Dataverse client using IHttpClientFactory:
public static IServiceCollection AddDataverseHttpClient(this IServiceCollection services, string dataverseUrl)
{
    services.AddHttpClient("DataverseClient", client =>
        {
            client.BaseAddress = new Uri(dataverseUrl);
            client.DefaultRequestHeaders.Accept.Add(new MediaTypeWithQualityHeaderValue("application/json"));
            client.DefaultRequestHeaders.Add("OData-MaxVersion", "4.0");
            client.DefaultRequestHeaders.Add("OData-Version", "4.0");
            client.DefaultRequestHeaders.Add("Prefer", "odata.include-annotations=\"*\"");
        })
        .AddHttpMessageHandler(_ => new DataverseManagedIdentityAuthHandler())
        .AddStandardResilienceHandler(); // optional

    services.AddScoped<DataverseHttpClient>(); // your custom wrapper

    return services;
}
Leave a Reply